Create your account on Helium
Create your Helium account at app.tryhelium.com. This will take you to the Dashboard, where you can create paywalls, manage api keys and integrations, run A/B tests, view analytics, and more.Connect your products from the app store
Let’s start by importing products from the app store.- Go to app.tryhelium.com/products
- Click Connect App Store
- Enter your App Store Connect credentials
- Click Connect

Do this step even if you’re using RevenueCat, your products will still be in Apple App Store. Direct RevenueCat and Google Play import coming soon!
Create a new paywall
Time to create your first paywall with Helium!- Click on the Paywalls tab in the sidebar (or go here).
- Click Create New Paywall. You can create a paywall
- From a screenshot of an existing paywall (recommended)
- From a Helium template
- From a Figma design link (make sure to make its visibility public!)
- From scratch
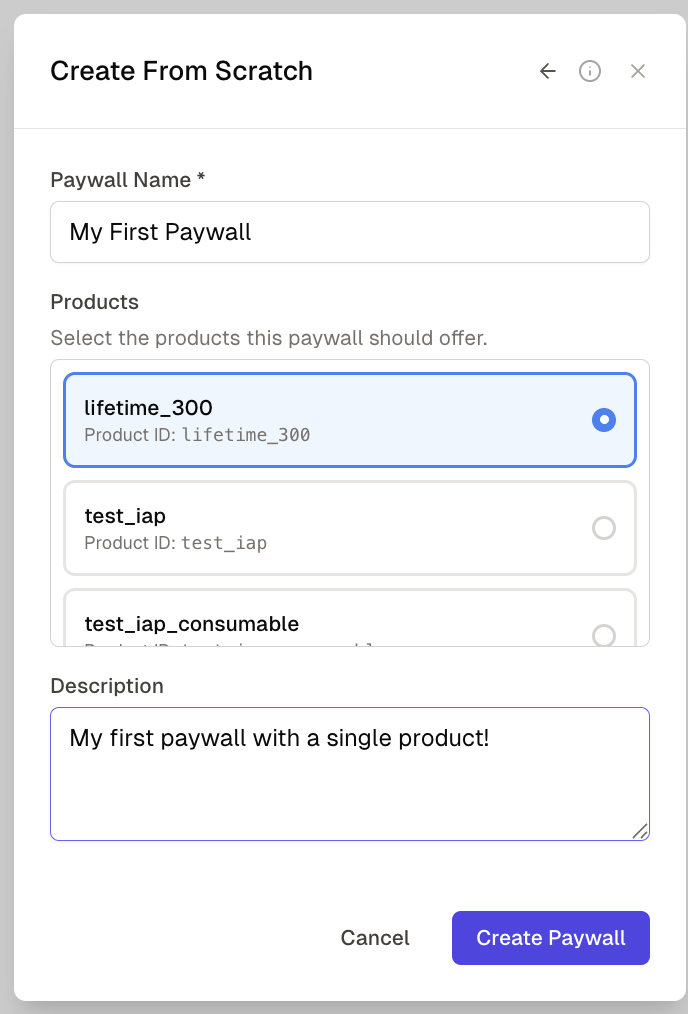
- Give your paywall a name, description, and select a few products. (Don’t worry if you’re not sure which products to use - you can swap in/out products later and Helium will automatically update your paywall.) Then, hit Create Paywall

Use the Helium editor to edit and customize your paywall
(Docs here coming soon!) For now, just hit Save to save your paywall. You should then see a screenshot of your paywall in the Paywalls tab. In the next section, we’ll get it live.Wire up your paywall to a workflow/trigger
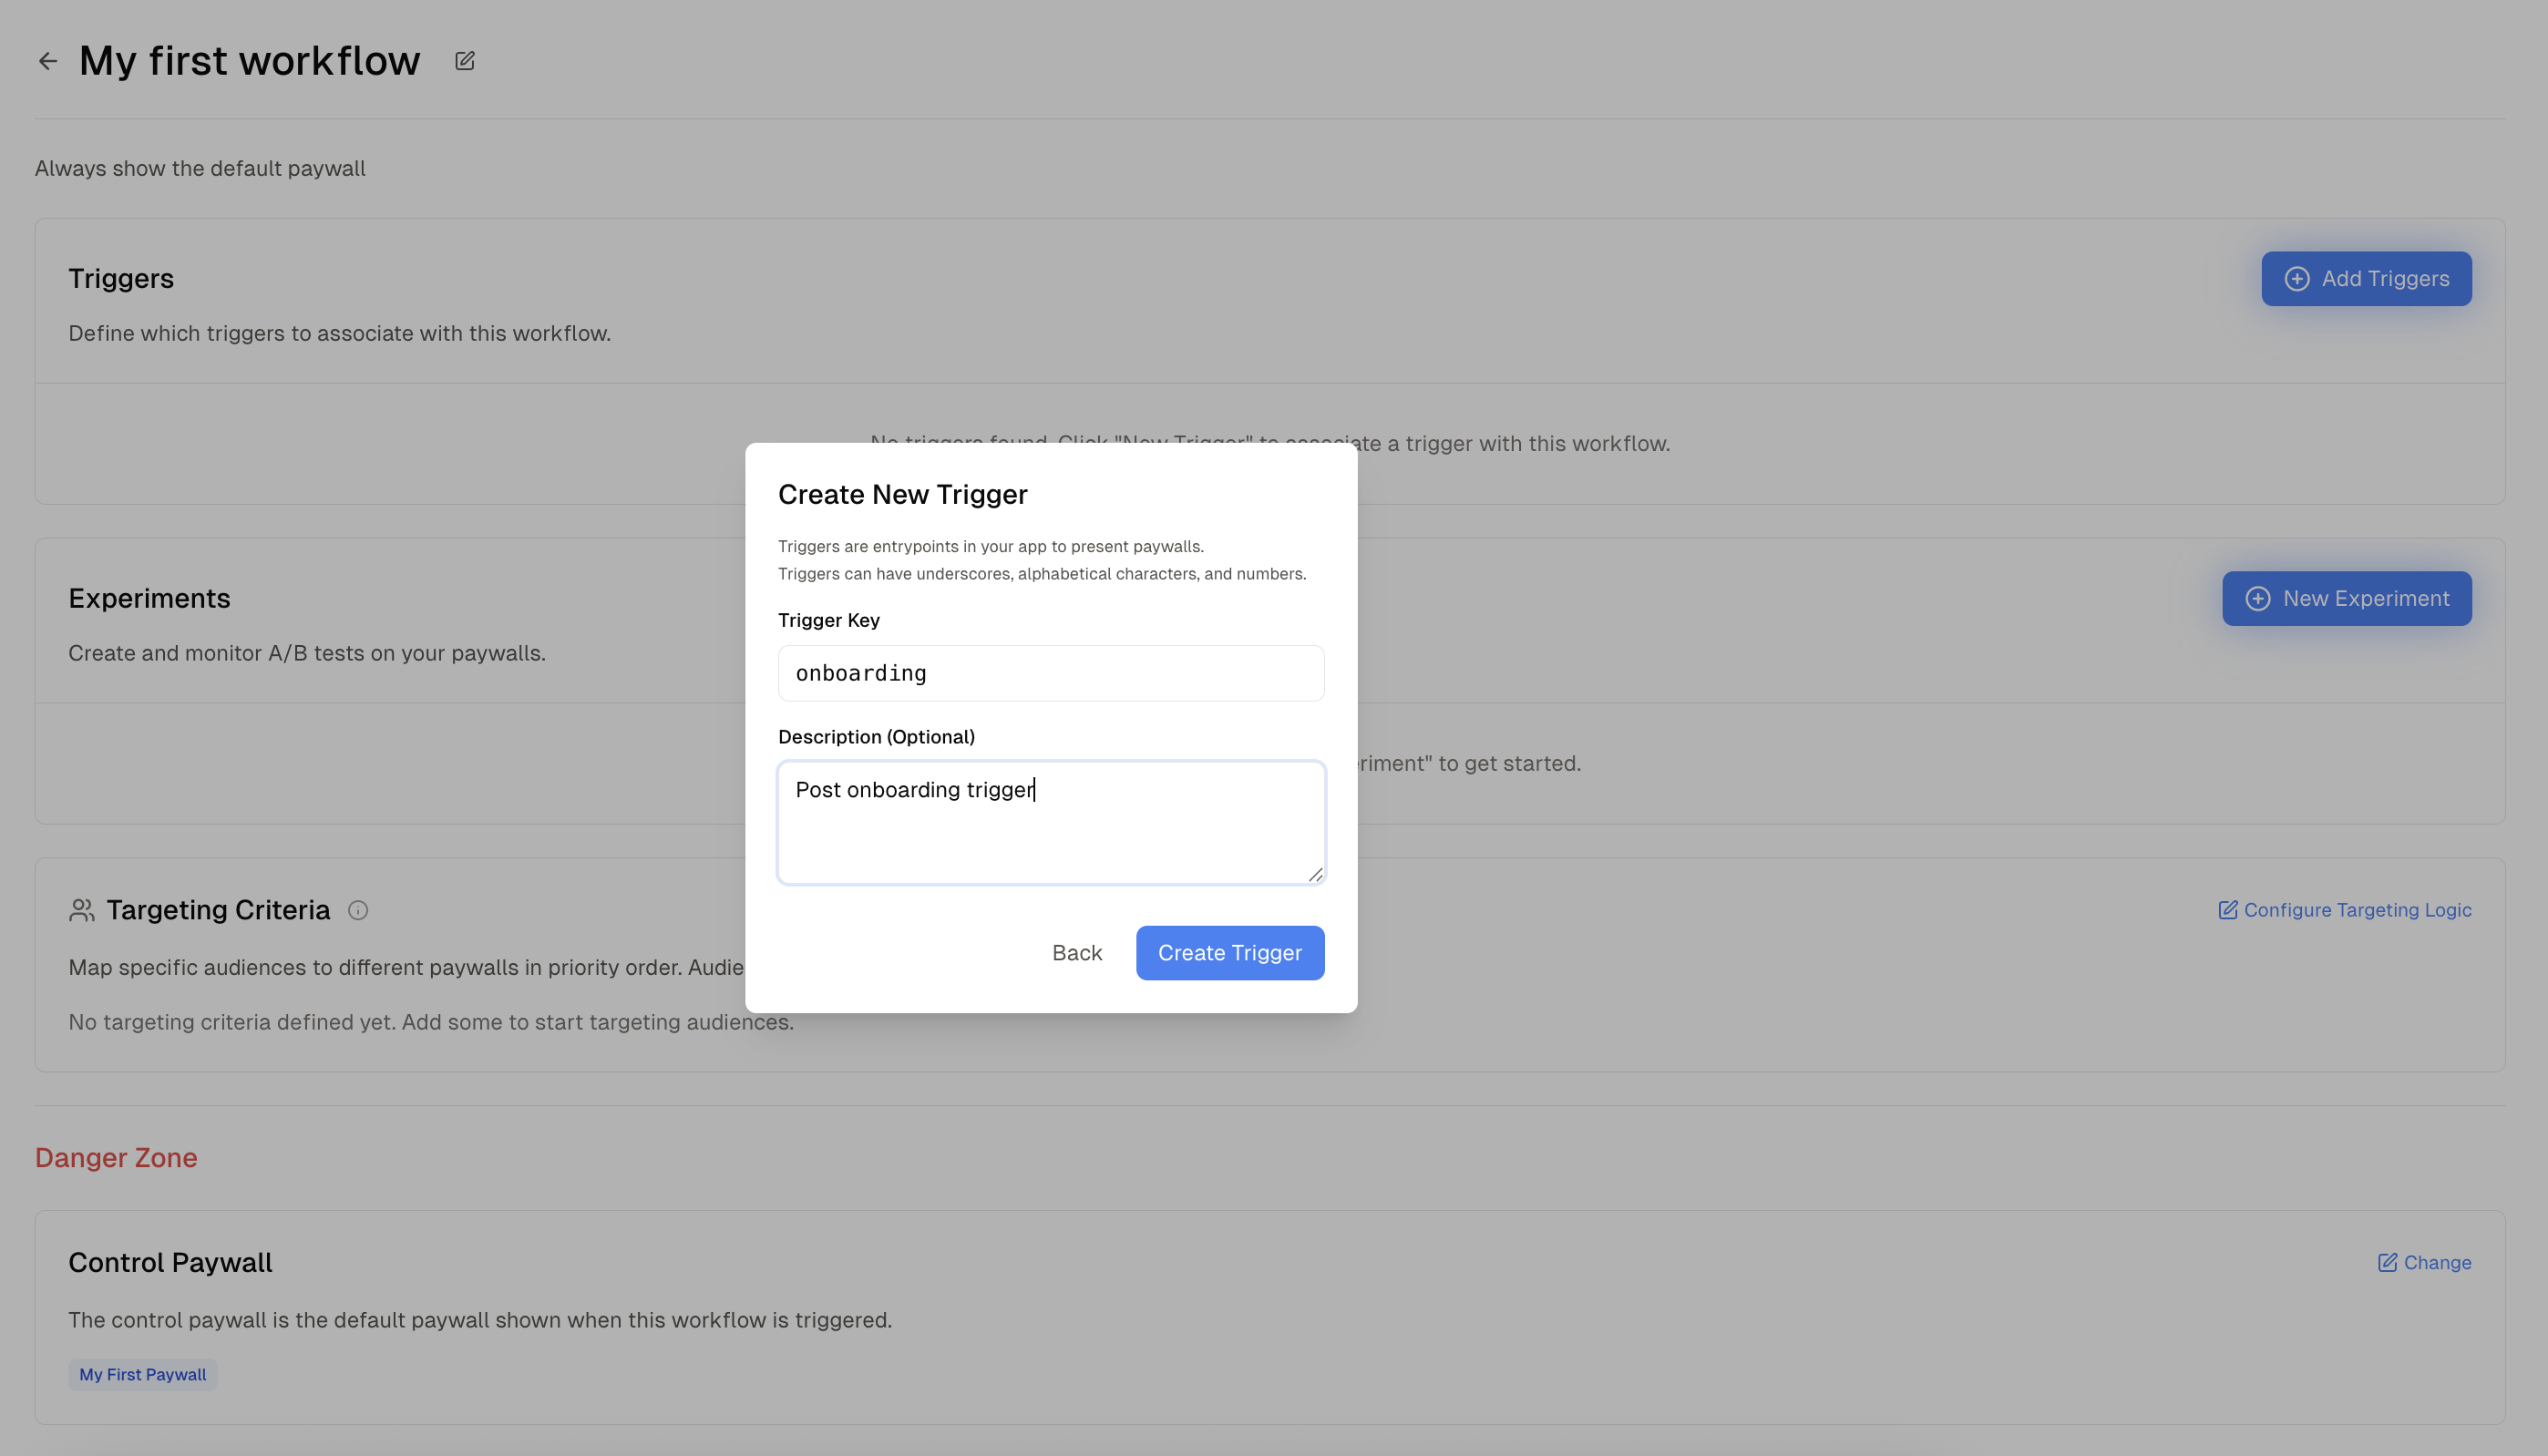
Helium uses several concepts that define what paywalls users see, and where in the app they’ll be seen. Triggers are placements within your app where you’d like to show a paywall. Trigger names should be lower cased and under_scored, because the SDK code will refer to these strings. Important - Make sure to be careful when deleting a trigger! It’s usually safer to not delete triggers in most cases, and just create new ones when needed. You might have apost_onboarding paywall right after onboarding (we recommend this!), settings_screen for in-settings upgrade for high-intent users, or a premium_feature_upsell. Reach out to the
Helium team for a free app scan to give you recommendations for your app.
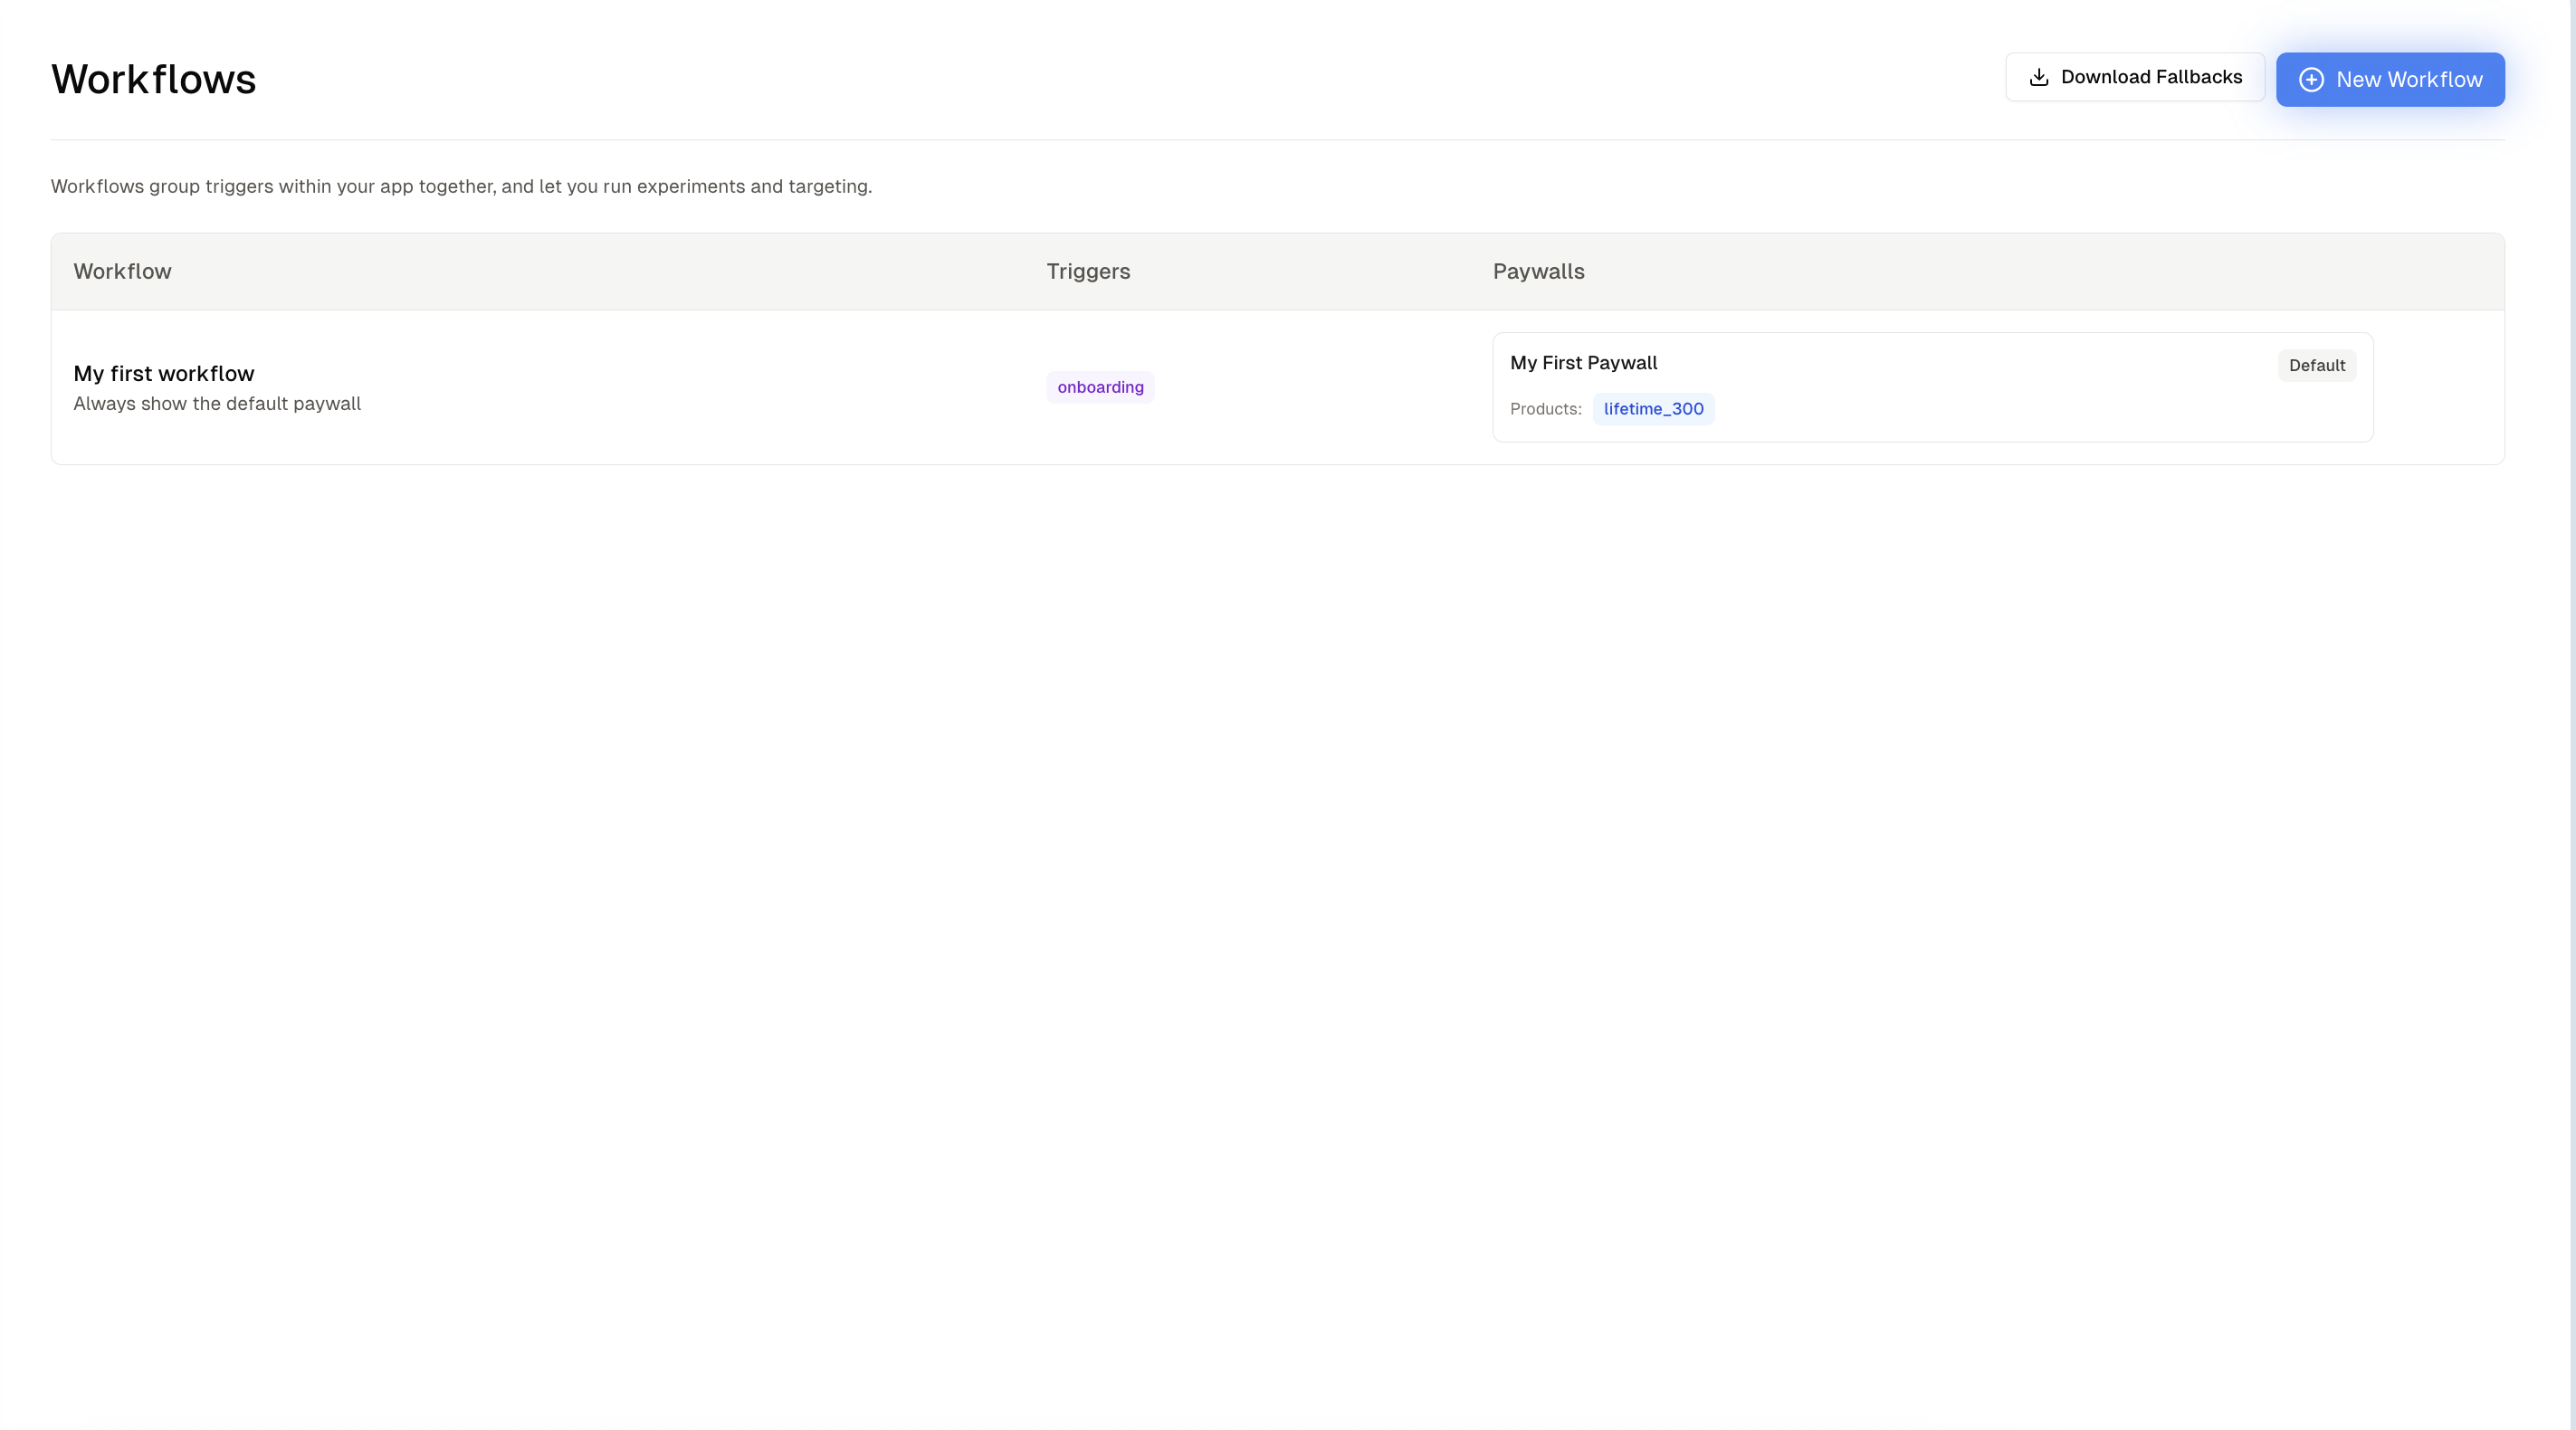
Workflows are groups of triggers that should point to the same paywall, or that share same targeting or experimentation setup.
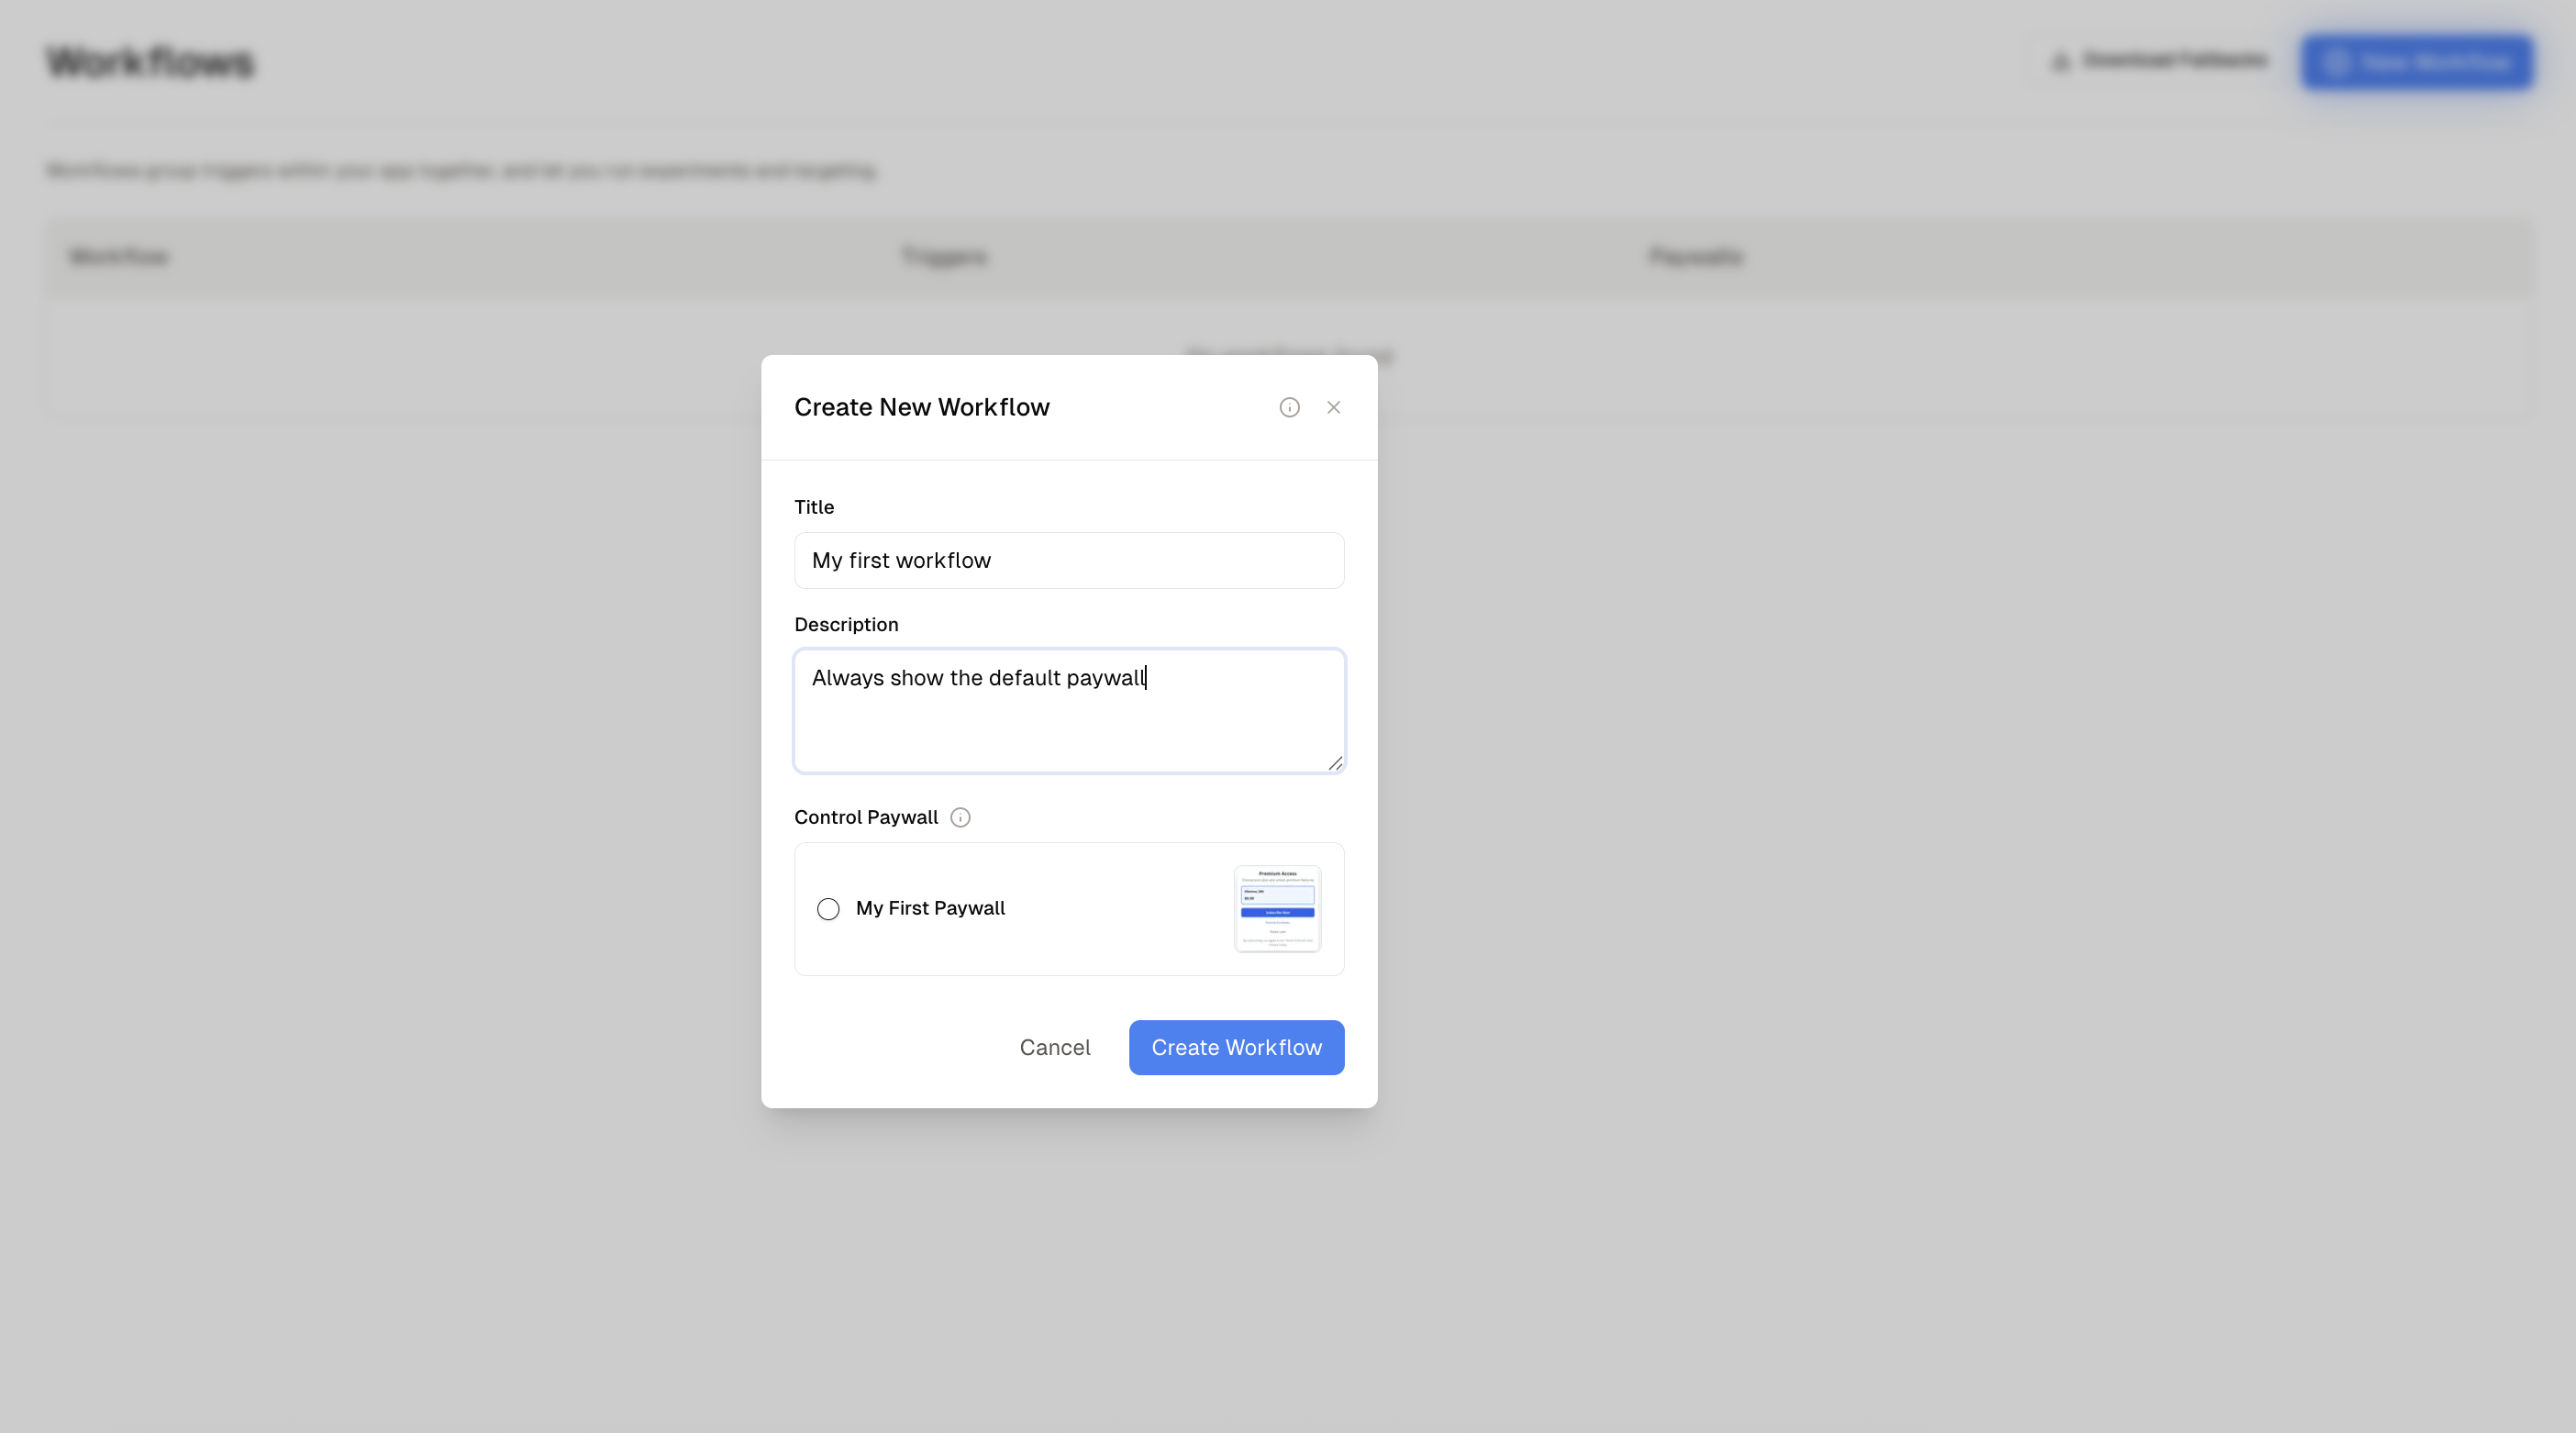
Let’s start with a simple workflow and trigger. Go to the Workflows tab in the lefthand sidebar, and click New Workflow. Select the
paywall you saved in the previous step.

onboarding:


Install and set up the SDK
First, have an API key handy. You can find yours by clicking on the Account Settings tab in the bottom left, and clicking Create New API Key. Then, choose your mobile platform and follow the integration quickstart:iOS
Swift/SwiftUI/UIKit
Android
Kotlin/Jetpack Compose/XML
React Native
React Native/Expo
Flutter
Flutter integration
Set up revenue reporting so Helium can automatically optimize your revenue
Follow our guide on revenue connection to connect Helium to revenue events via webhooksRevenue reporting enables Helium to track conversion rates, optimize paywalls, and provide detailed analytics about your subscription performance.
Set up fallbacks to guarantee 100% paywall uptime for your users
Follow our guide on fallbacks to guarantee that you’ll have 100% uptime of your paywalls even if a user doesn’t have network.Pre-launch and go live!
Before going live, here’s a quick checklist. As always, reach out via your Helium slack channel or to [email protected] if you’d like any help with testing.Testing Checklist
- Paywall created with products
- Workflow + trigger created
- SDK set up and paywall fetching wired up
- Tested localized price display + in app purchases


